

ArduinoPixel

ArduinoPixel का विवरण
Control your NeoPixel LED strip from your phone or tablet.
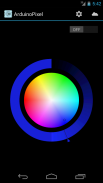
Change the strip's color, continuously, and in real-time... turn it on and off... all, from the convenience of your Android device.
Getting started is really easy:
* Take an Arduino Ethernet and a NeoPixel LED strip.
* Upload the provided code on the Arduino, https://codebender.cc/sketch:31742. (Read the comments for instructions.)
* Connect the Arduino to your local network.
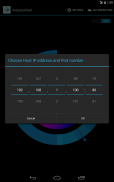
* Install the app, go to settings and specify the network parameters for your Arduino Web Server. If you see the "Hello from Arduino Server" message, then you know the setup is correct.
That's it! Enjoy
--------------------------------------------------------------------------------
Update:
I developed ArduinoPixel for personal use, but then I decided to share it. The app offers only those features I needed at that moment, realizing though that NeoPixels can do much more interesting things than simply light up. By now, enough people have used the app and responded with some positive feedback and ideas that I wanted to do something about it. In the near future, I intend to start working on the app again. If you have any requests and features you'd like to see implemented, please send me an email and tell me about them. I'll make sure to take your input into account.
Some ideas I have in mind about the project/app:
* Develop a web interface to allow the use from a web browser
* Set the turn on/off times of the strip in order to operate autonomously
* Allow the use of multiple strips
* Set two colors and a period of time, so that the strip can gradually cycle between them
* Add support for the $3 ESP8266 WiFi enabled boards
</div> <div jsname="WJz9Hc" style="display:none">अपने फोन या गोली से अपने NeoPixel एलईडी पट्टी पर नियंत्रण रखें।
अपने Android डिवाइस की सुविधा से, ... सभी ... लगातार, और वास्तविक समय में, पट्टी का रंग बदलने पर और बंद।
शुरू हो रही है वास्तव में आसान है:
* एक Arduino ईथरनेट और एक NeoPixel एलईडी पट्टी ले लो।
* Arduino, https://codebender.cc/sketch:31742 पर उपलब्ध कराई कोड अपलोड करें। (निर्देशों के लिए टिप्पणियों पढ़ें।)
* अपने स्थानीय नेटवर्क के लिए Arduino के कनेक्ट करें।
*, एप्लिकेशन इंस्टॉल करें सेटिंग्स में जाओ और अपने Arduino के वेब सर्वर के लिए नेटवर्क मानकों में निर्दिष्ट करें। आप "हैलो Arduino के सर्वर से" संदेश दिखाई देता है, तो आप सेटअप सही है पता है।
यह बात है! आनंद लें
-------------------------------------------------- ------------------------------
अपडेट:
मैं निजी इस्तेमाल के लिए ArduinoPixel विकसित की है, लेकिन फिर मैं इसे साझा करने का फैसला किया। एप्लिकेशन कि NeoPixels बस को प्रकाश की तुलना में बहुत अधिक रोचक बातें कर सकते हैं, हालांकि साकार, मुझे लगता है कि इस समय की जरूरत है केवल उन सुविधाओं का लाभ लें। अब तक, काफी लोग एप्लिकेशन का इस्तेमाल किया है और मैं इसके बारे में कुछ करना चाहता था कि कुछ सकारात्मक प्रतिक्रिया और विचारों के साथ प्रतिक्रिया व्यक्त की। निकट भविष्य में, मैं फिर से app पर काम शुरू करने का इरादा है। क्या आप कार्यान्वित देखना चाहते हैं किसी भी जगह और सुविधाओं है, तो मुझे एक ईमेल भेजने के लिए और मुझे उनके बारे में बता सकते हैं। मैं खाते में अपने इनपुट लेने के लिए सुनिश्चित करेंगे।
कुछ विचार मैं इस परियोजना / अनुप्रयोग के बारे में मन में है:
* एक वेब ब्राउज़र से उपयोग करने की अनुमति के लिए एक वेब इंटरफ़ेस का विकास
स्वायत्त संचालित करने के क्रम में * पट्टी के / बंद समय पर बारी सेट
* कई स्ट्रिप्स के उपयोग की अनुमति
* दो रंग और समय की अवधि के सेट उन दोनों के बीच पट्टी कर सकते हैं धीरे-धीरे चक्र इतना है कि
$ 3 ESP8266 वाईफाई बोर्डों सक्षम के लिए * सहायता जोड़ें</div> <div class="show-more-end">


